Channels
Discord
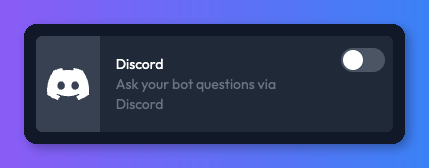
The Discord channel allows you to interact with your bot right in Discord! Use it to create bots for your community, your support server, or whatever else you can think of.
By enabling the Discord channel you can bring a powerful AI assistant into any Discord server. Your bot can:
- Answer questions using your bot's knowledge base directly in Discord channels.
- Respond to slash commands for a clean, integrated experience.
- Help moderate, support, or engage your community with AI-powered responses.
Discord quick start
If you want to get set up with Discord quickly, check out the video below:
Creating a Discord bot
Before you start
The Discord integration is only available on Standard, Pro and Enterprise plans.
Before you can connect Chat Thing to Discord you need to create a Discord bot. Creating a bot is easy and it allows you to customise how it appears on your server.
- First go here: https://discord.com/developers/applications
- Click the new application button in the top right.
- Give your application a name and click the "Create" button.
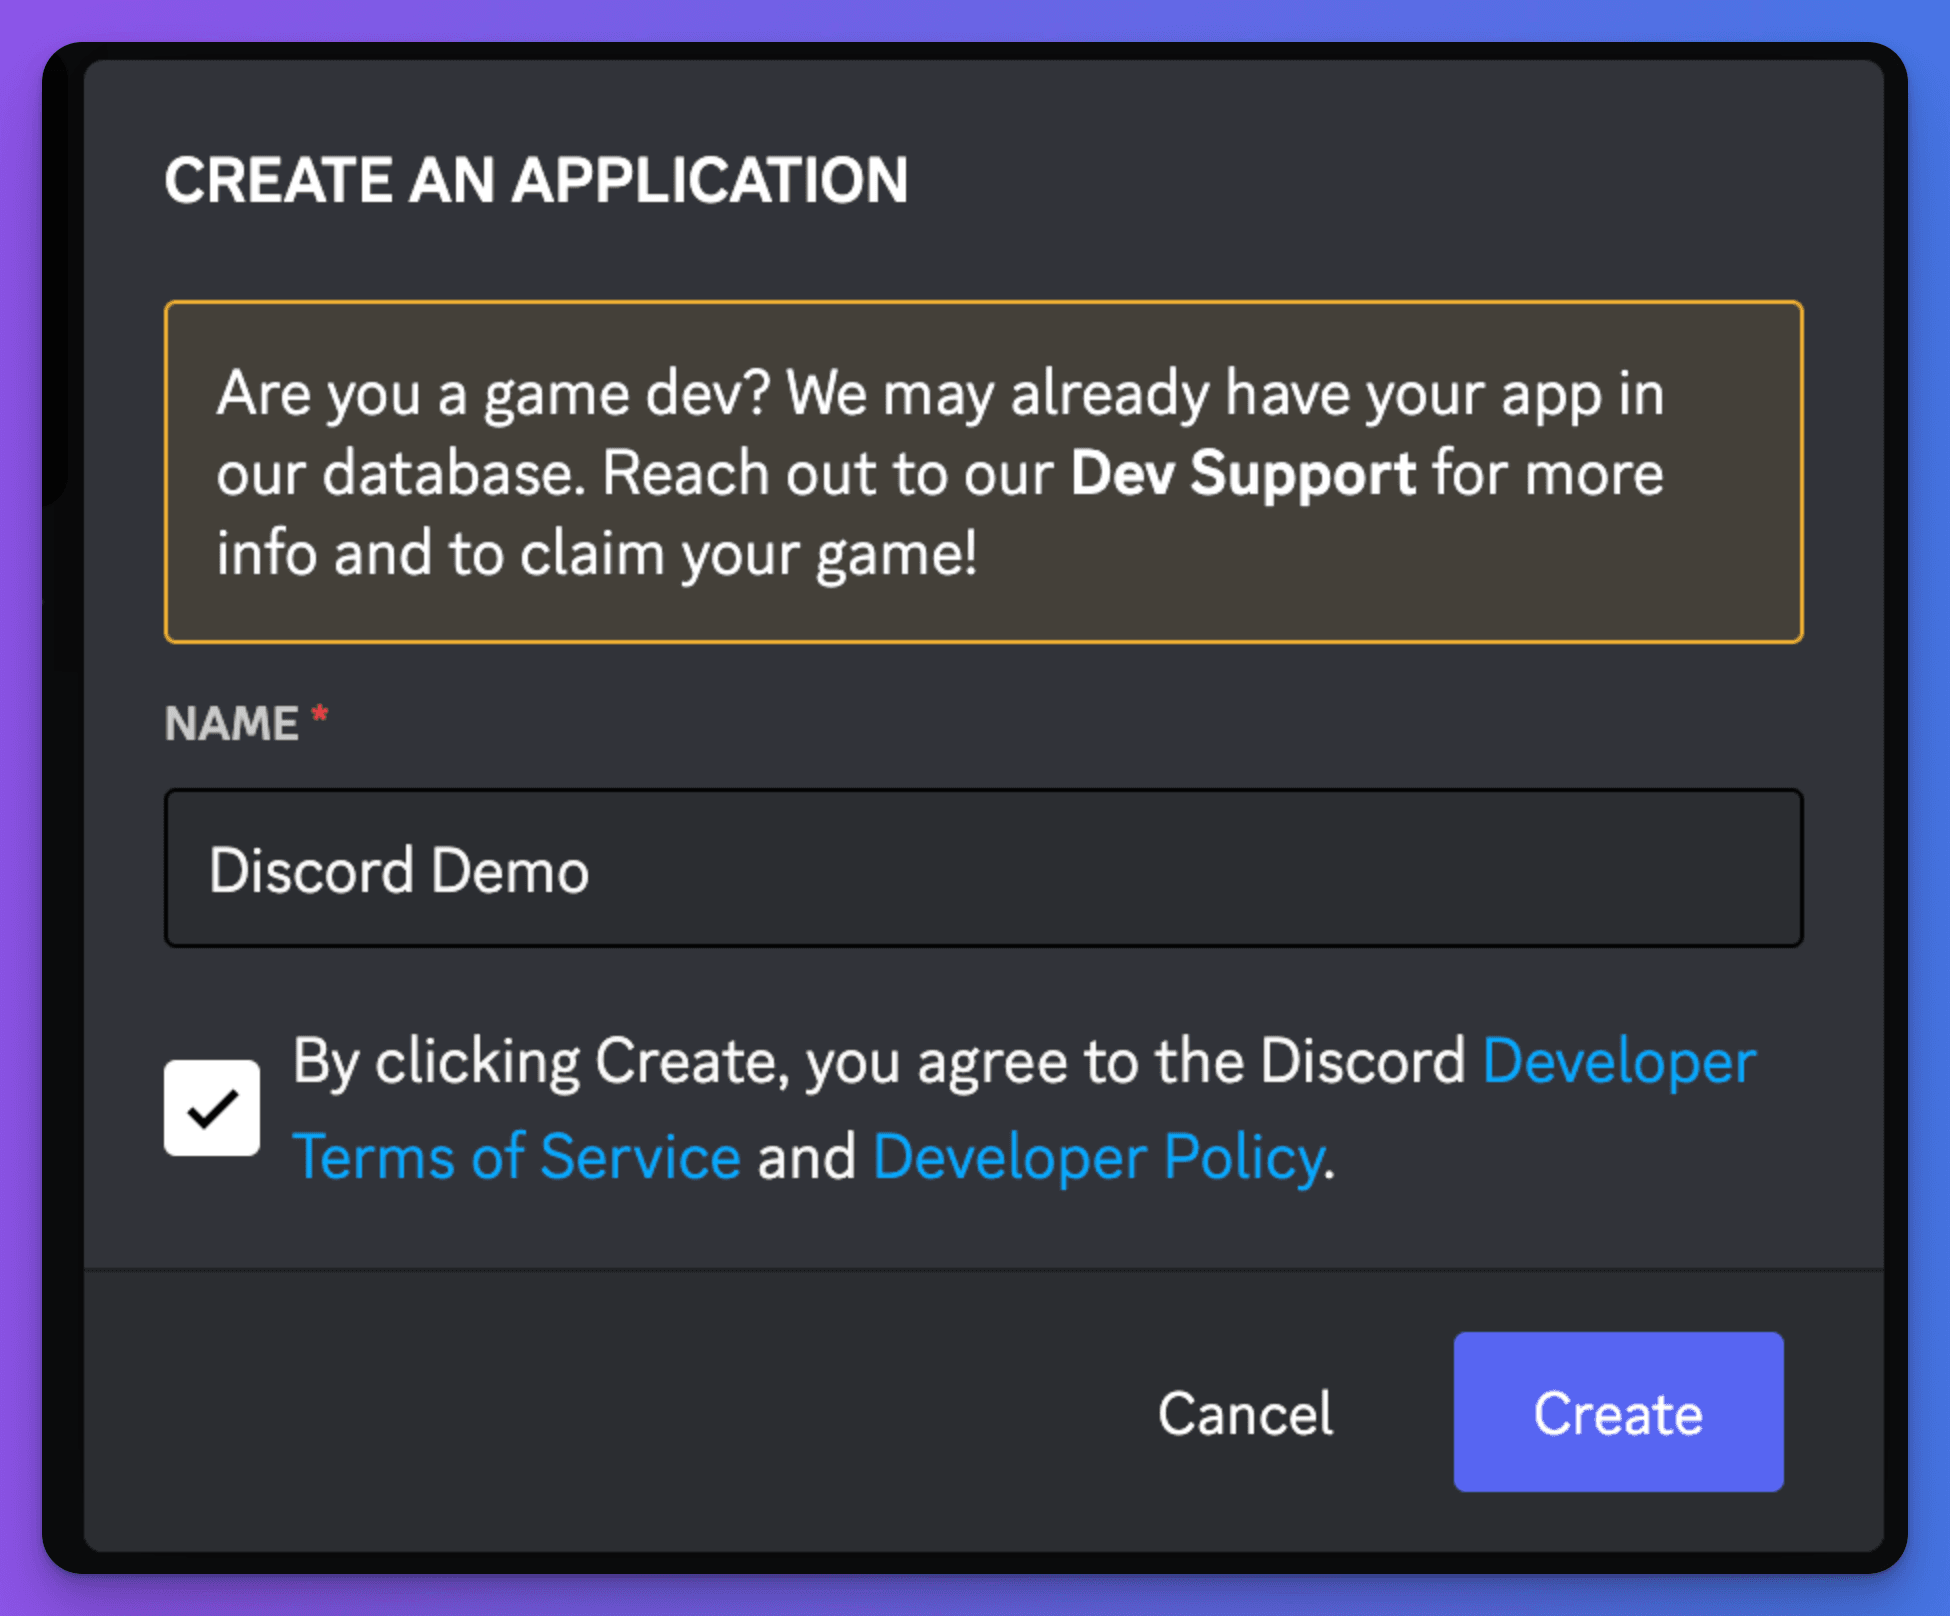
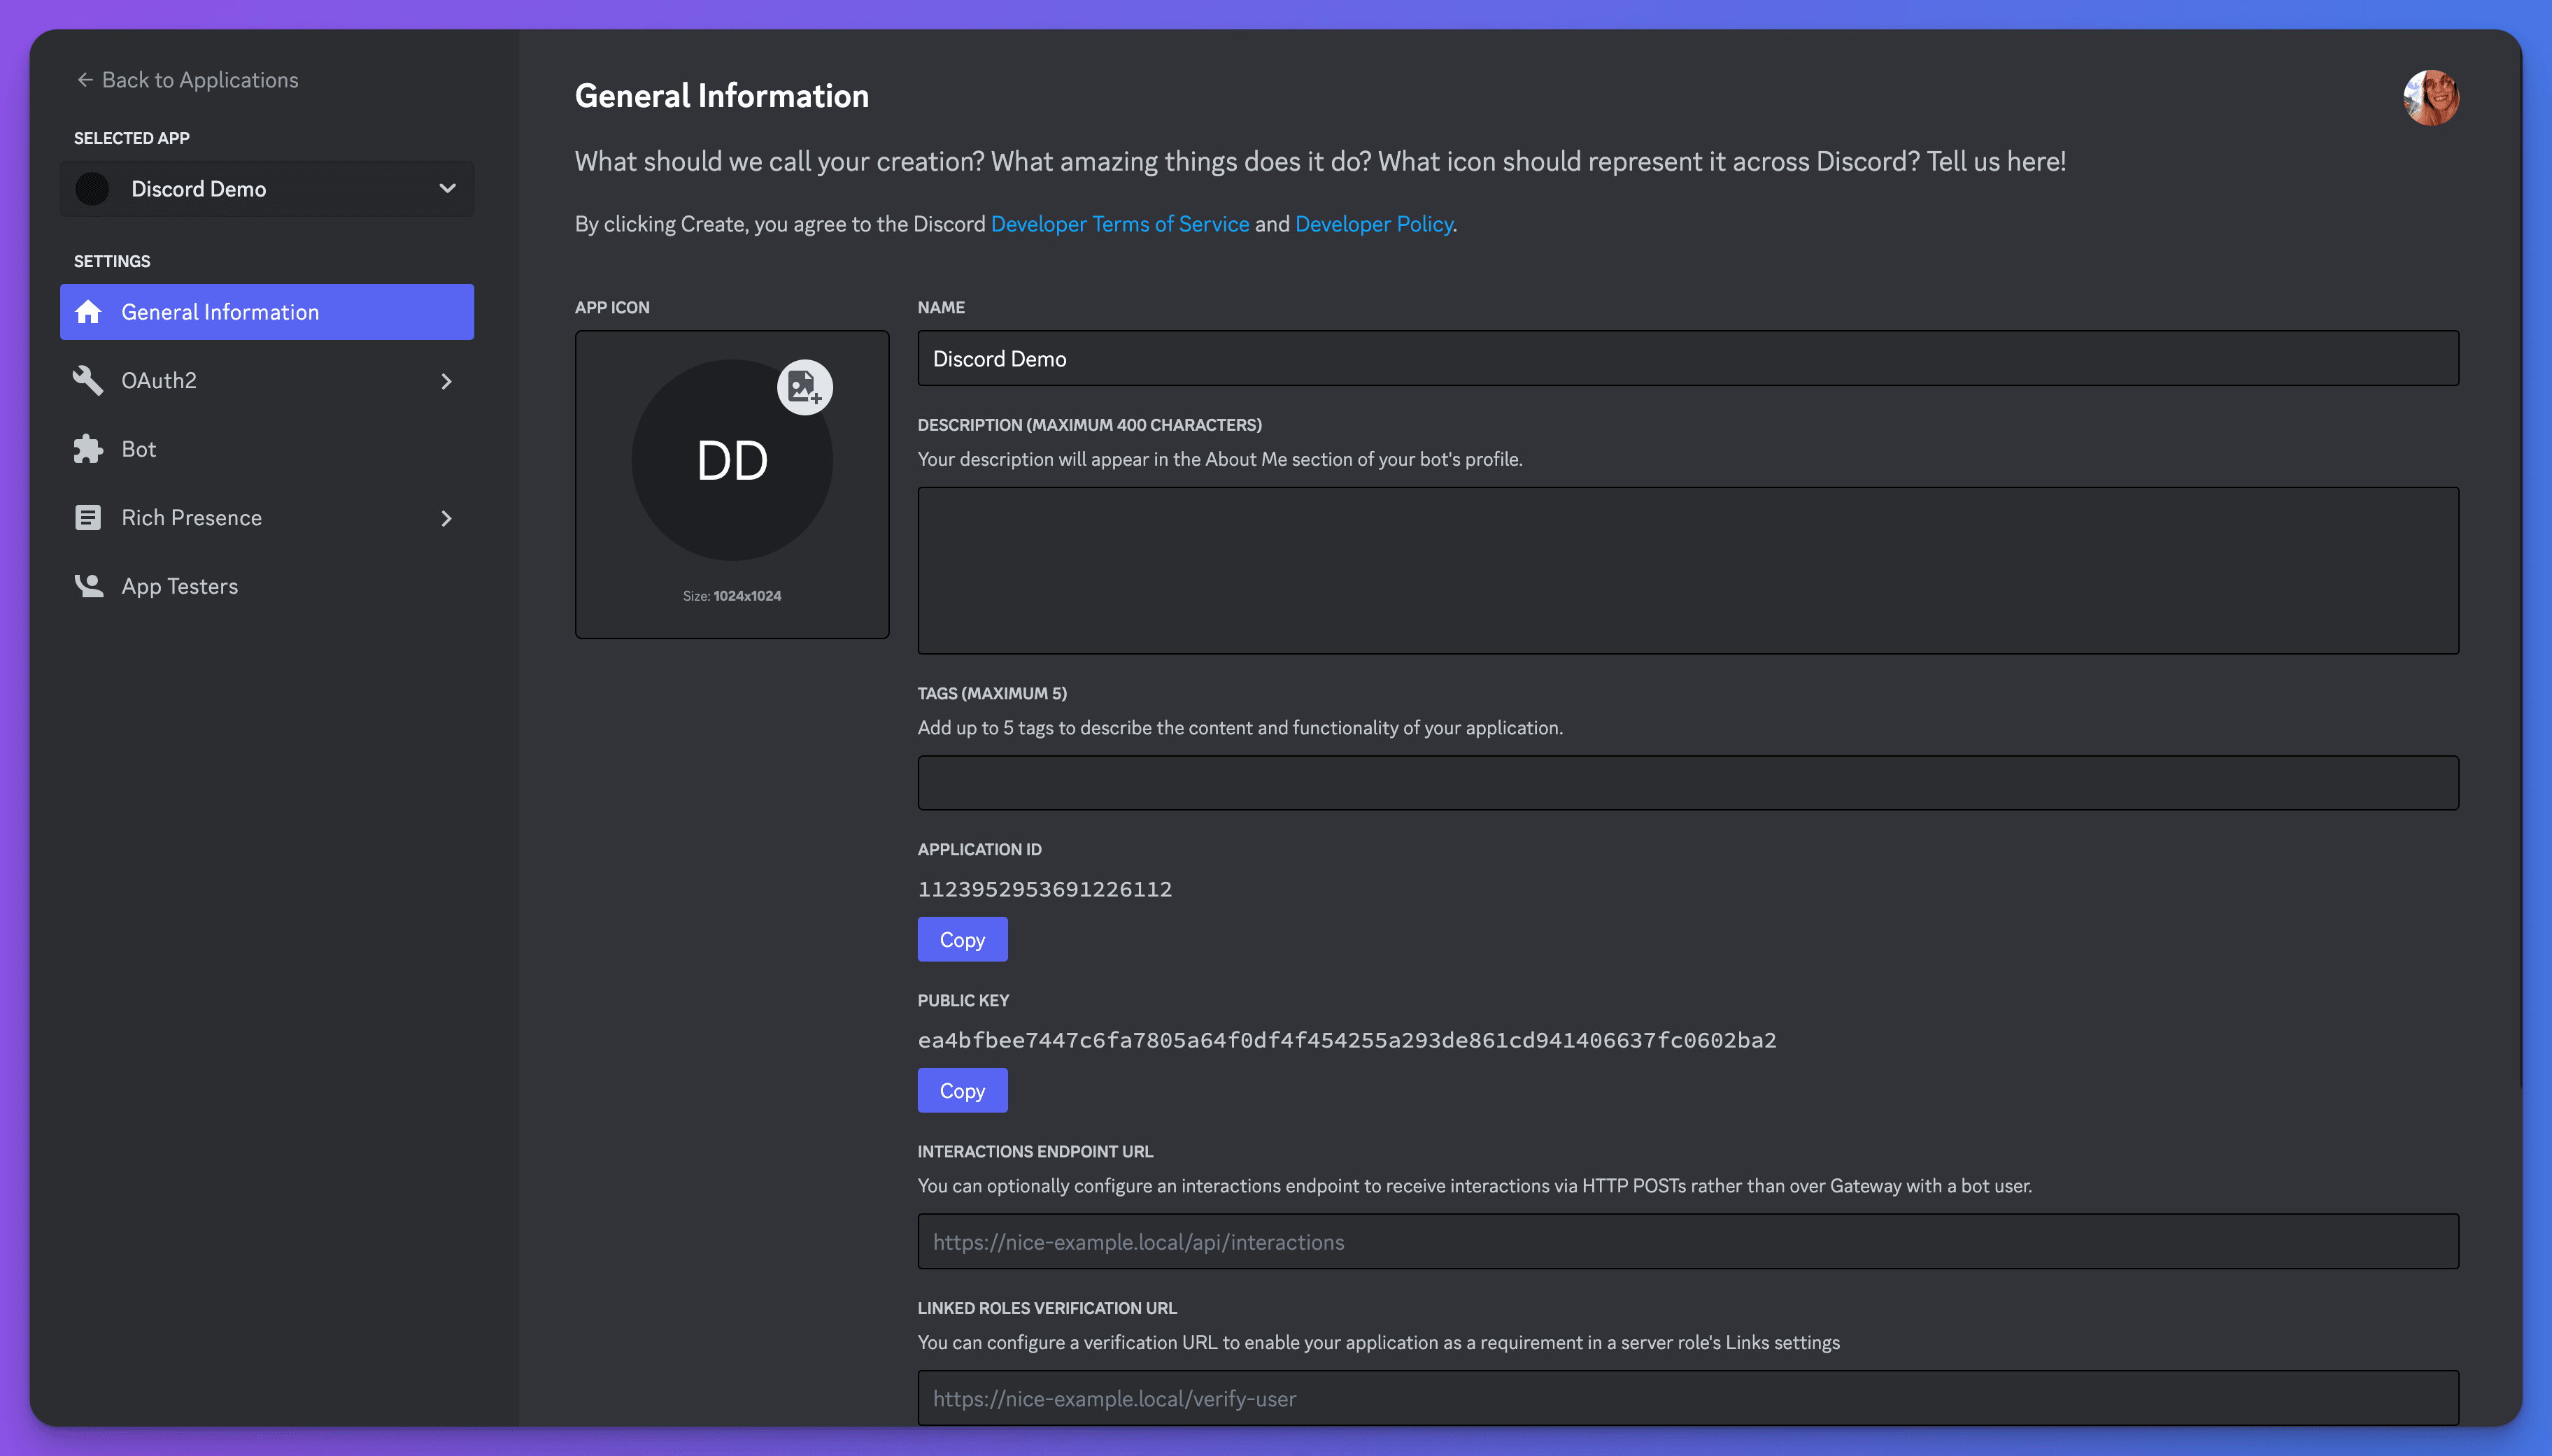
- Your bot will be created and you will be redirected to the bot admin page. Note the application ID — you will need this in the next step.
Connecting your bot to Discord
- From your bot dashboard, go to the Channels tab and enable the Discord channel by clicking its toggle switch.
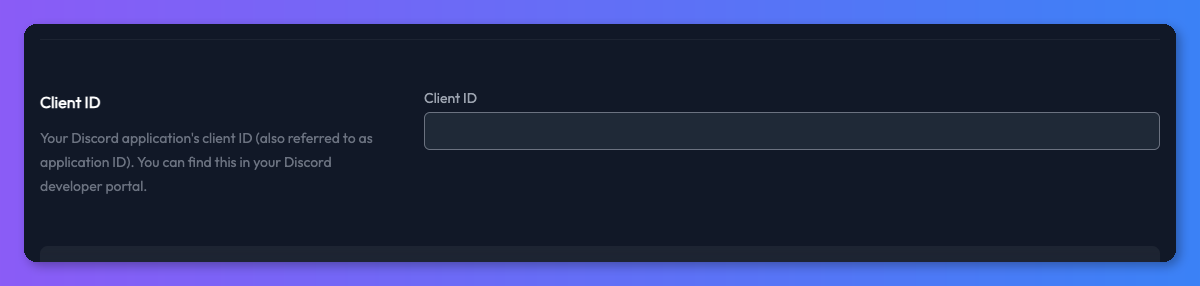
- In the settings page that appears, paste your bot's application/client ID into the field.
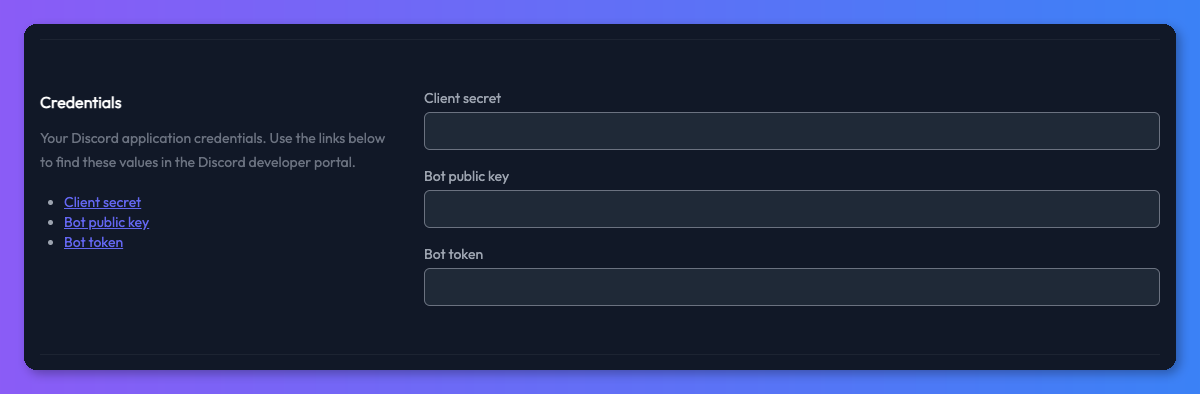
- After entering your client ID you will see a number of other settings appear. Before your bot can be connected, you will need to find three more pieces of information from the Discord bot admin: client secret, bot public key, and bot token. You can use the links in the settings to help you find these, or keep reading and we will show you how.
- First, add your Discord bot client secret. You will need to get this from the "OAuth2" section of the Discord bot admin. When you are on the page, click the "Reset secret" button to display the secret so you can copy it.
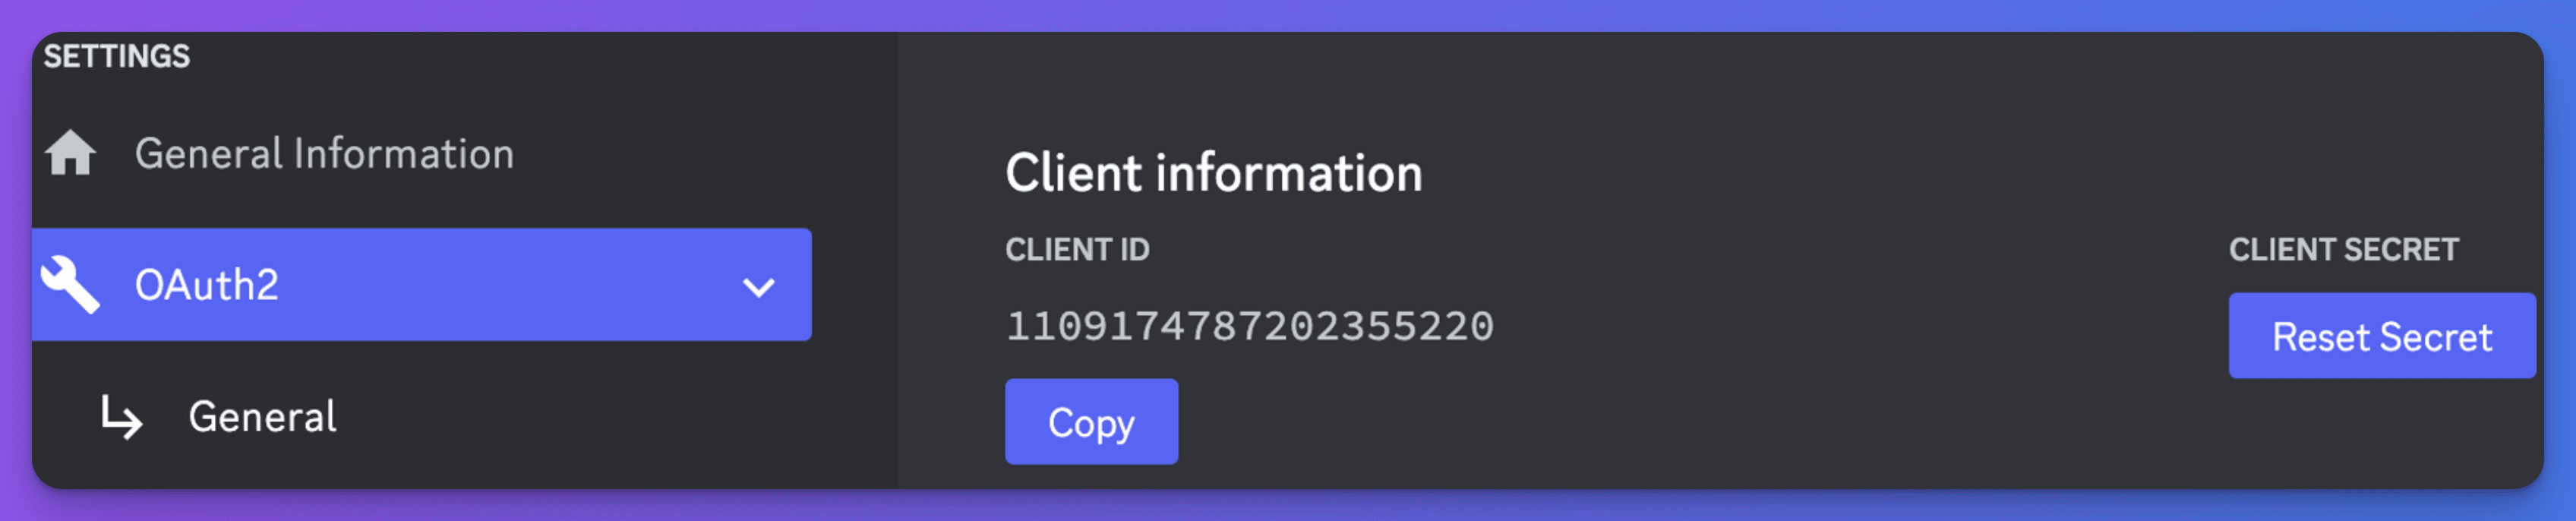
- Paste this back into the client secret field in Chat Thing.
- Next you need to find the bot public key. This can be found on the general information page of the Discord bot admin.

- Copy the key and add it into the "Bot public key" field in the Chat Thing Discord settings.
- Finally, you need the bot token from the Discord bot admin. This can be found in the "Bot" section. Once there, click the "Reset token" button to reveal the token so you can copy it.

- Paste it into the "Bot token" field in the Discord settings.
- Go back to the Chat Thing Discord settings and click the "Update settings" button. It's important you do this before progressing to the next steps!
- Next we need to add two pieces of data back into the Discord bot admin: the OAuth2 redirect URL and the Interactions endpoint URL. You can use the links above these fields in the Chat Thing Discord settings to take you to the correct areas on Discord.
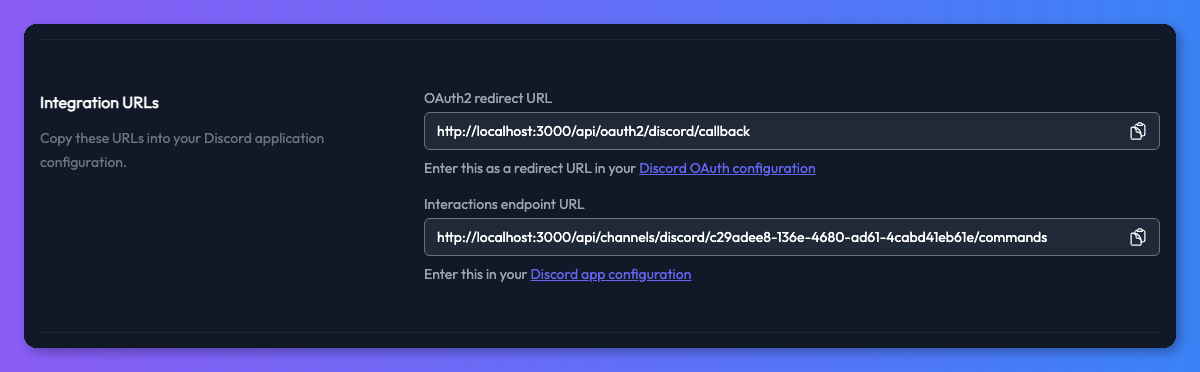
- Copy the OAuth2 redirect URL from the Chat Thing Discord settings.
- Go to the Discord admin OAuth2 page and click the "Add redirect" button.
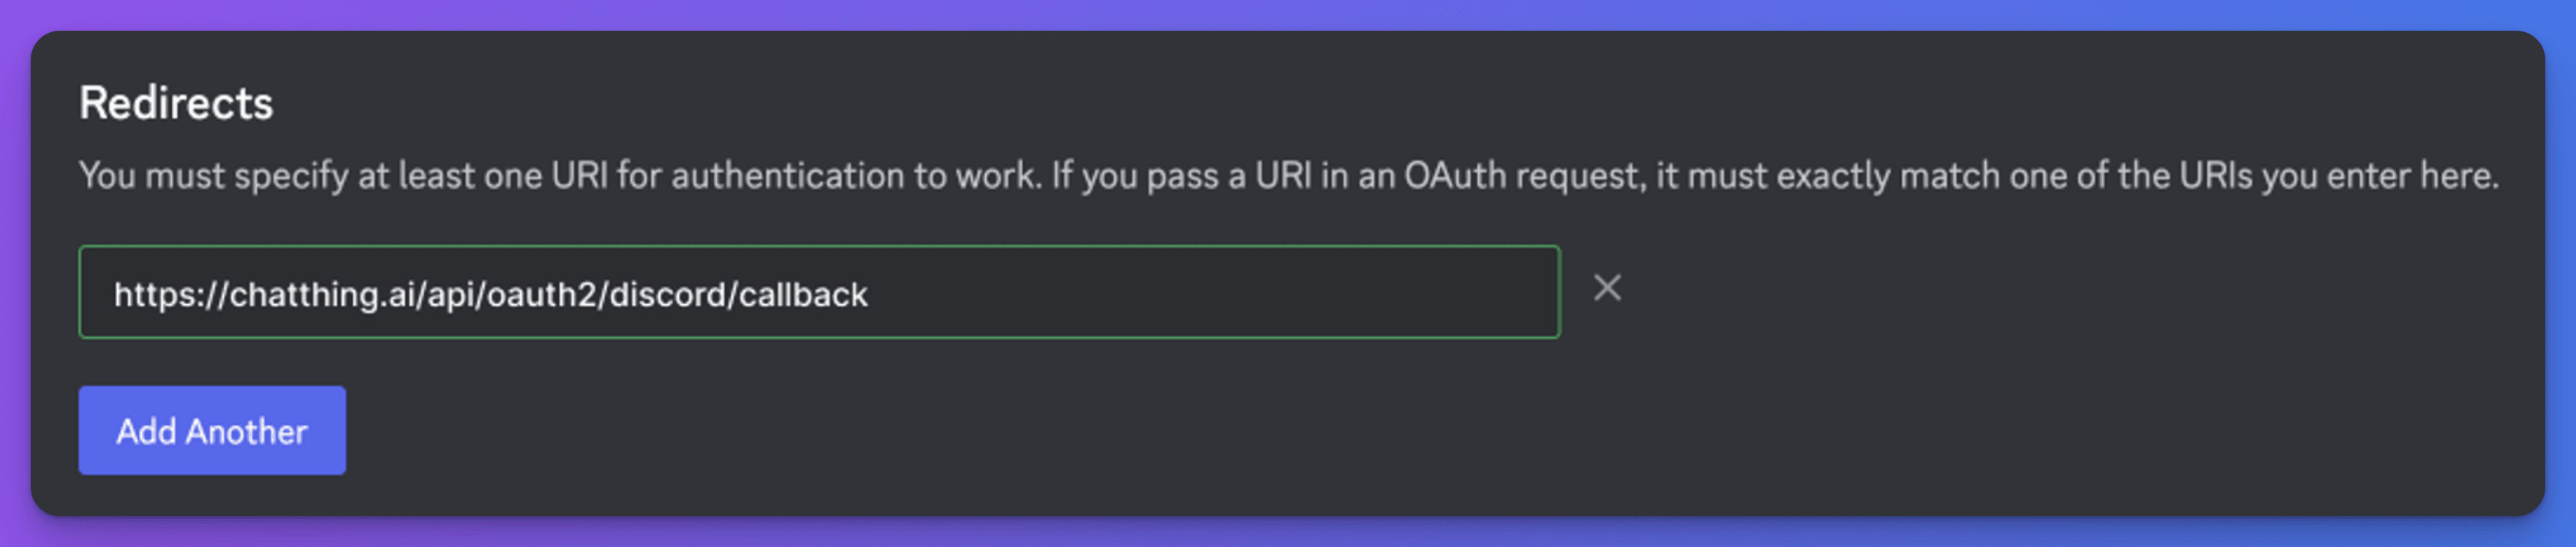
- Paste in the redirect URL, and then click the "Save changes" button that appears at the bottom of the page.

- Go back to the Chat Thing Discord settings and copy the Interactions endpoint URL. Go to the general information section of the Discord bot admin and paste the URL into the "Interactions endpoint URL" field.

- Click the "Save changes" button that appears at the bottom of the page.
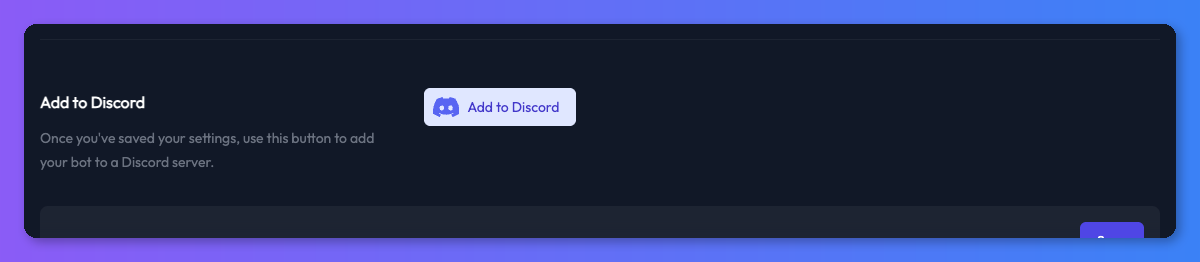
- Finally, click the "Add to Discord" button to choose a Discord server to install your bot.
- Then click "Continue".
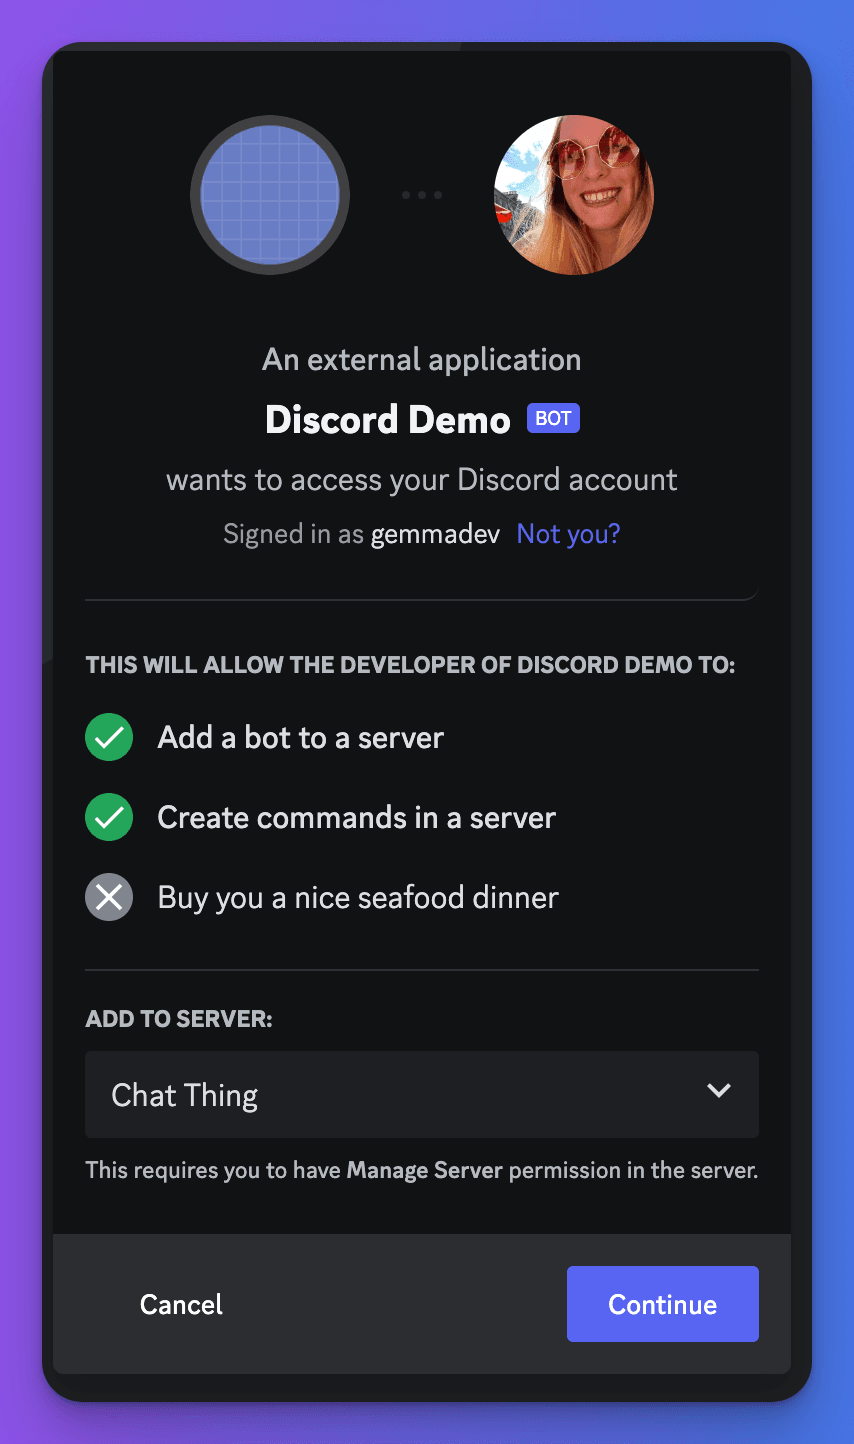
- Authorise the bot and you're all set!
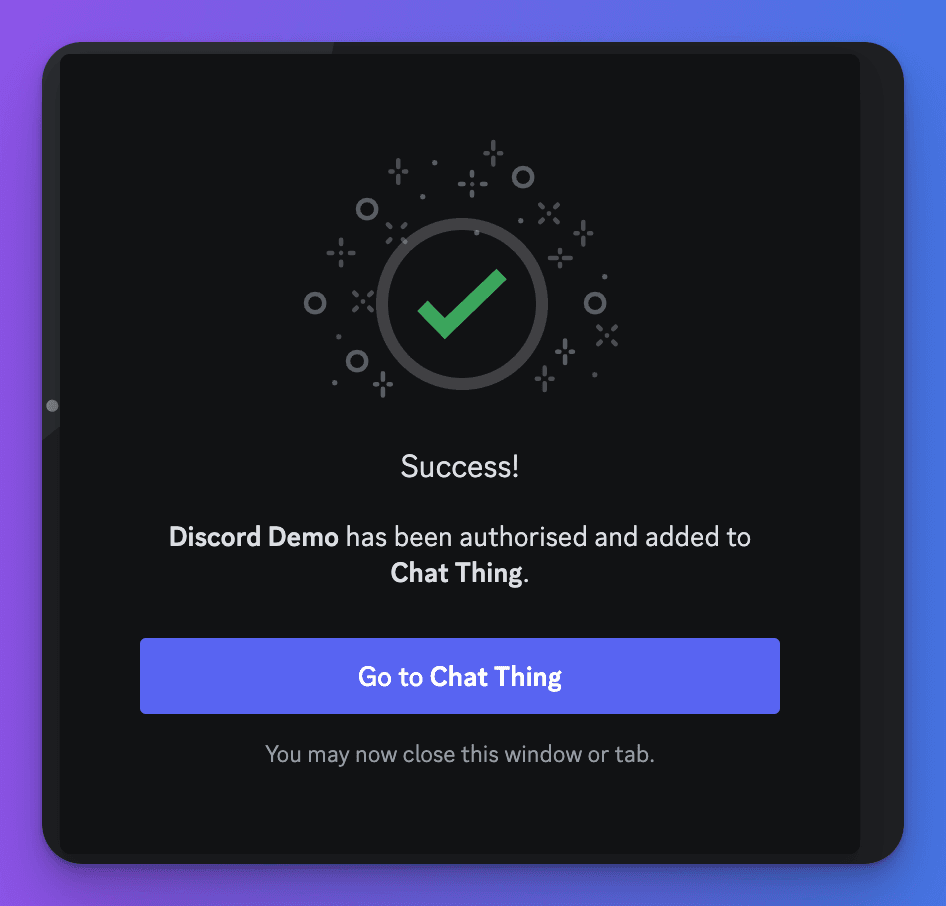
When you go to your Discord server, you should now see the bot and be able to chat with it.

Changing Discord bot settings
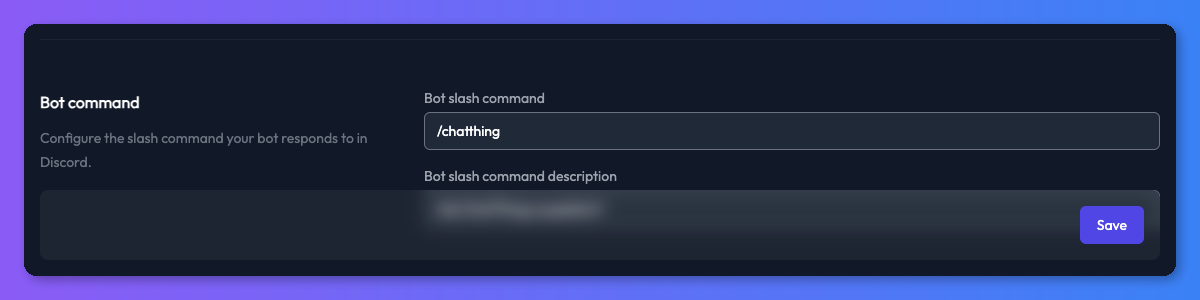
Changing the slash command and description
Your Discord bot responds to a configurable slash command (e.g. /askbot). You can set this in the "Bot command" section of the Chat Thing Discord settings, along with a description that appears when users type the command in Discord. The command must start with /, contain only lowercase letters and numbers, and be at least 4 characters long.
To change these, open the channel settings, make your adjustments and click "Save". Your changes will appear in any Discord server where your bot is installed.
Changing the Discord bot icon
Changing the bot icon can be completed through the Discord bot admin area in the "General information" section.
Changing the Discord bot display name
Changing the Discord bot display name can be completed through the Discord bot admin area in the "Bot" section.
Troubleshooting
I've completed all the steps and my Discord bot's not working
The most common issue is a mistake while entering the credentials from Discord into the Chat Thing settings — don't worry, it's easy to do!
Try going back through each step and double checking you have entered the correct credentials in each box. You will need to reset the client secret and bot tokens. After doing this, update your settings and try again.
I can't save after adding the interactions endpoint in the Discord bot admin
This can happen if you haven't updated your channel settings in Chat Thing with the bot secret, public key, and token, or if any one of those is wrong. Check these, save in Chat Thing, and then try again in Discord.